
前言
在从零开始搭建自己的VueJS2.0+ElementUI单页网站(一、环境搭建)一文中,我们已经配置好了开发所需的各种环境。 在这篇博文中,我们即将进入开发阶段。 对于单页应用来说,导航页面是一个至关重要的页面,所有的组件都会在这个页面上展示。 接下来我们开始开发导航页面。
为正文创建导航页面组件
我们在src目录下新建一个文件夹,名为components,以后我们的组件都会放在这个文件夹中。 在components目录下新建Navi目录,并在Navi目录下新建一个名为Navi.vue的组件。 此时我们的目录应该如下所示:
然后我们修改main.js文件,修改后的文件如下
import Vue from 'vue'
import ElementUI from 'element-ui'
import 'element-ui/lib/theme-default/index.css'
import Navi from './components/Navi/Navi.vue'
Vue.use(ElementUI)
new Vue({
  el: '#app',
  render: h => h(Navi)
})
我们可以看到render函数的参数已经从之前的App变成了我们新创建的Navi组件。 以后我们程序入口显示的就是Navi.vue上的内容。 默认生成的App.vue文件已经没有用了,我们可以删除它。

接下来我们对导航页面进行一个简单的布局。 我们先看一下布局代码。
导航视图
<template>
    <div style="background-color: #EBEBEB;min-height:800px">
        <div style="width:100%;background-color: #636363; overflow: hidden">
            <span class="demonstration" style="float:left;padding-top:10px;color:white;margin-left:1%">
                网站首页
            </span>
            <span class="demonstration" style="float:left;padding:5px;color:white;margin-left:2%;width:15%">
                <el-input
                        placeholder="请输入"
                        icon="search"
                        v-model="searchCriteria"
                        :on-icon-click="handleIconClick">
                </el-input>
            </span>
            <span class="demonstration" style="float:right;padding-top:10px;margin-right:1%">
                <el-dropdown trigger="click">
                  <span class="el-dropdown-link" style="color:white">
                    admin<i class="el-icon-caret-bottom el-icon--right"></i>
                  </span>
                  <el-dropdown-menu slot="dropdown">
                    <el-dropdown-item>个人信息</el-dropdown-item>
                    <el-dropdown-item>退出登录</el-dropdown-item>
                  </el-dropdown-menu>
                </el-dropdown>
            </span>
        </div>
        <div style="margin-top:5px">
            <el-row :gutter="10">
                <el-col :xs="4" :sm="4" :md="4" :lg="4">
                    <div>
                        <el-menu default-active="1" class="el-menu-vertical-demo" style="min-height:800px">
                            <el-menu-item index="1"><i class="el-icon-message"></i>导航一</el-menu-item>
                            <el-menu-item index="2"><i class="el-icon-menu"></i>导航二</el-menu-item>
                            <el-menu-item index="3"><i class="el-icon-setting"></i>导航三</el-menu-item>
                        </el-menu>
                    </div>
                </el-col>
                <el-col :xs="20" :sm="20" :md="20" :lg="20">
                    <div>
                        <div style="border: 1px solid #A6A6A6; border-radius:6px; padding:5px; margin:2px; background-color: white">
                            <el-breadcrumb separator="/">
                                <el-breadcrumb-item v-for="item in breadcrumbItems">{{item}}</el-breadcrumb-item>
                            </el-breadcrumb>
                        </div>
                    </div>
                </el-col>
            </el-row>
        </div>
    </div>
</template>
<script type="text/ecmascript-6">
    export default {
        data(){
            return {
                searchCriteria: '',
                breadcrumbItems: ['导航一'],
            }
        },
        methods:{
            handleIconClick(ev) {
                console.log(ev);
            }
        },
    }
</script>
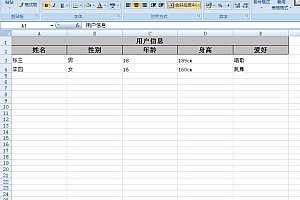
我们来看看今天的首页是什么样子的
这里使用了一些ElementUI组件,比如右侧的菜单栏,右侧显示“导航1”的面包屑组件。 使用el-row和el-col的作用是对组件进行响应式处理。 这些组件的详细使用方法可以参见。
配置路由信息
创建好主页导航栏后,我们需要配置路由信息。 vue-router是vuejs单页应用的关键。 在配置路由信息之前,我们首先创建我们需要跳转到的页面。 我们首先在components目录下新建三个组件:page1、page2和page3,并为每个组件添加一行文字,如page1
<template>
    <div>
        这是第一个页面
    </div>
</template>
<script type="text/ecmascript-6">
    export default {
        data(){
            return {}
        }
    }
</script>
page2和page3分别写“这是第二页”和“这是第三页”。
这三个页面代表我们写的要跳转到的三个页面。接下来我们使用
npm install vue-router --save安装 vue-router。
安装完成后elementui登录界面,我们在src目录下创建一个名为router的新目录,然后在router文件夹下构建一个名为index.js的javascript文件。 创建完成后,当前目录结构为
该router目录下的index.js是vue-router的配置文件。 我们将以下代码添加到该文件中:
import Vue from 'vue'
import VueRouter from 'vue-router'
import Page1 from '../components/Page1.vue'
import Page2 from '../components/Page2.vue'
import Page3 from '../components/Page3.vue'
Vue.use(VueRouter)
const router = new VueRouter({
    routes:[{
        path: '/Page1', component: Page1
    },{
        path: '/Page2', component: Page2
    },{
        path:'/Page3', component: Page3
    }]
})
export default router;
这里是跳转路径的配置。 然后更改main.js

import Vue from 'vue'
import ElementUI from 'element-ui'
import 'element-ui/lib/theme-default/index.css'
import Navi from './components/Navi/Navi.vue'
import router from './router/index'
Vue.use(ElementUI)
new Vue({
  el: '#app',
  router,
  render: h => h(Navi)
})
这样我们的路由器就可以在全球范围内使用了。
接下来我们更改Navi.vue,
修改后的文件如下:
<template>
    <div style="background-color: #EBEBEB;min-height:800px">
        <div style="width:100%;background-color: #636363; overflow: hidden">
            <span class="demonstration" style="float:left;padding-top:10px;color:white;margin-left:1%">
                网站首页
            </span>
            <span class="demonstration" style="float:left;padding:5px;color:white;margin-left:2%;width:15%">
                <el-input
                        placeholder="请输入"
                        icon="search"
                        v-model="searchCriteria"
                        :on-icon-click="handleIconClick">
                </el-input>
            </span>
            <span class="demonstration" style="float:right;padding-top:10px;margin-right:1%">
                <el-dropdown trigger="click">
                  <span class="el-dropdown-link" style="color:white">
                    admin<i class="el-icon-caret-bottom el-icon--right"></i>
                  </span>
                  <el-dropdown-menu slot="dropdown">
                    <el-dropdown-item>个人信息</el-dropdown-item>
                    <el-dropdown-item>退出登录</el-dropdown-item>
                  </el-dropdown-menu>
                </el-dropdown>
            </span>
        </div>
        <div style="margin-top:5px">
            <el-row :gutter="10">
                <el-col :xs="4" :sm="4" :md="4" :lg="4">
                    <div>
                        <el-menu default-active="1" class="el-menu-vertical-demo" style="min-height:800px" @select="handleSelect">
                            <el-menu-item index="1"><i class="el-icon-message"></i>导航一</el-menu-item>
                            <el-menu-item index="2"><i class="el-icon-menu"></i>导航二</el-menu-item>
                            <el-menu-item index="3"><i class="el-icon-setting"></i>导航三</el-menu-item>
                        </el-menu>
                    </div>
                </el-col>
                <el-col :xs="20" :sm="20" :md="20" :lg="20">
                    <div>
                        <div style="border: 1px solid #A6A6A6; border-radius:6px; padding:5px; margin:2px; background-color: white">
                            <el-breadcrumb separator="/">
                                <el-breadcrumb-item v-for="item in breadcrumbItems">{{item}}</el-breadcrumb-item>
                            </el-breadcrumb>
                        </div>
                    </div>
                    <div style="margin-top:10px">
                        <router-view></router-view>
                    </div>
                </el-col>
            </el-row>
        </div>
    </div>
</template>
<script type="text/ecmascript-6">
    export default {
        data(){
            return {
                searchCriteria: '',
                breadcrumbItems: ['导航一'],
            }
        },
        methods:{
            handleIconClick(ev) {
                console.log(ev);
            },
            handleSelect(key, keyPath){
                switch(key){
                    case '1':
                        this.$router.push('/Page1');
                        this.breadcrumbItems  = ['导航一']
                        break;
                    case '2':
                        this.$router.push('/Page2')
                        this.breadcrumbItems  = ['导航二']
                        break;
                    case '3':
                        this.$router.push('/Page3')
                        this.breadcrumbItems  = ['导航三']
                        break;
                }
            },
        },
    }
</script>
注意文件里多了一个
<div style="margin-top:10px">
    <router-view></router-view>
</div>
该router-view用于显示跳转的页面,即page1、page2、page3。 我们在左侧菜单栏添加了响应,并在响应函数中进行了路由跳转处理。 this.$router.push('/Page1'); 这句话的意思是把当前要跳转的页面推入router字段。 这里之所以使用push而不是直接给出字段参数elementui登录界面,是希望用户点击浏览器中的后退和前进按钮时能够返回到上一页。 修改完成后我们可以看一下效果,注意浏览器地址栏的变化:
可以看到,当我们点击两侧导航栏上的不同项目时,浏览器地址栏中显示的地址发生变化,右侧显示的文字也对应了三个页面组件。 至此,一个可路由、可跳转的主页就完成了。
结论
在这篇文章中我们创建了自己的网站导航页面,可以看到还是比较简单的。 在下一篇博客中,我将介绍各个跳转组件的详细编写方法,以及组件编程中各个组件的通信方法。